In this post we explore what it takes to provision a remote Linux server, and then deploy one or more Laravel project applications to it.
Note that by “project applications” I mean prototypes, interview homework projects, and the like.
In particular we’ll be deploying several instances of the Template Application we’ve been developing in this series.
Prerequisites and assumptions
For this post I assume you already know how to instantiate a Linux instance on the cloud provider of your choice, and that you <3 the command line. I also assume you’ve already gone ahead and spun up a server, and have full sudo access to it.
For reference here is what I’m working from for this write-up:
- Provider: Amazon AWS
- AMI: Ubuntu Server 18.04 LTS (HVM), SSD Volume Type - ami-05c1fa8df71875112 (64-bit x86) / ami-0606a0d9f566249d3 (64-bit Arm)
- Type: t2.micro
Security
I’m not going to delve much into security in this post, as that’s a whole other write-up unto itself. I would suggest; however, that at a minimum reviewing a quick-start guide such as this one.
The process
We first need to access the server, update it, and then install the core components we’ll need.
Adding swap space
First thing we’ll do is enable some swap space. The t2.micro instances don’t start out with any, and it causes issues later with npm if we don’t do it now. (Reference)
From the command terminal:
sudo /bin/dd if=/dev/zero of=/var/swap.1 bs=1M count=1024
sudo /sbin/mkswap /var/swap.1
sudo /sbin/swapon /var/swap.1
Example:
ubuntu@ip-172-31-23-22:$ sudo /bin/dd if=/dev/zero of=/var/swap.1 bs=1M count=1024
1024+0 records in
1024+0 records out
1073741824 bytes (1.1 GB, 1.0 GiB) copied, 13.4465 s, 79.9 MB/s

ubuntu@ip-172-31-23-22:$ sudo /sbin/mkswap /var/swap.1
mkswap: /var/swap.1: insecure permissions 0644, 0600 suggested.
Setting up swapspace version 1, size = 1024 MiB (1073737728 bytes)
no label, UUID=0a0c61cf-ace9-48e8-8b30-0dbcd98a3fa3

ubuntu@ip-172-31-23-22:$ sudo /sbin/swapon /var/swap.1
swapon: /var/swap.1: insecure permissions 0644, 0600 suggested.

ubuntu@ip-172-31-23-22:$ free
              total        used        free      shared  buff/cache   available
Mem:        1007520      271128       68516        2356      667876      588200
Swap:       1048572           0     1048572
ubuntu@ip-172-31-23-22:/var/www/html/AppTemplate$
Install dev tools
It seems like every time I don’t install build-essential something requires it, so let’s go ahead and take care of that now. The tree package isn’t required, but I often find myself using it.
sudo apt-get update && sudo apt-get upgrade
sudo apt-get install build-essential tree
Install LAMP
From the command terminal:
sudo apt install lamp-server^
This will of course install Apache, MySQL, and PHP.
Install PHP extensions, composer, and npm
From the command terminal:
sudo apt-get install php-mbstring php-xml php-zip
sudo apt-get install composer
sudo apt-get install npm
Configure Apache
Enable Apache module mod_rewrite
From the docs:
The mod_rewrite module uses a rule-based rewriting engine, based on a PCRE regular-expression parser, to rewrite requested URLs on the fly. By default, mod_rewrite maps a URL to a filesystem path. However, it can also be used to redirect one URL to another URL, or to invoke an internal proxy fetch.
mod_rewrite provides a flexible and powerful way to manipulate URLs using an unlimited number of rules. Each rule can have an unlimited number of attached rule conditions, to allow you to rewrite URL based on server variables, environment variables, HTTP headers, or time stamps.
mod_rewrite operates on the full URL path, including the path-info section. A rewrite rule can be invoked in httpd.conf or in .htaccess. The path generated by a rewrite rule can include a query string, or can lead to internal sub-processing, external request redirection, or internal proxy throughput.
To enable it from the command line:
sudo a2enmod rewrite
Update /etc/apache2/sites-available/000-default.conf
Next we want to configure Apache to serve the multiple Laravel applications we want to deploy. At first it may seem like we’d want to use Name-based Virtual Hosts, but I can assure you after hours of tinkering and reading posts from other people struggling to make it work the following method will help retain more of your sanity.
Edit the /etc/apache2/sites-available/000-default.conf and replace its contents with the following:
DocumentRoot /var/www/html
Alias /part-one /var/www/html/part-one/public
Alias /part-two /var/www/html/part-two/public
Alias /part-three /var/www/html/part-three/public

<Directory /var/www/html/part-one/public/>
  Options Indexes FollowSymLinks MultiViews
  AllowOverride All
  Order allow,deny
  allow from all
  Require all granted
</Directory>

<Directory /var/www/html/part-two/public/>
  Options Indexes FollowSymLinks MultiViews
  AllowOverride All
  Order allow,deny
  allow from all
  Require all granted
</Directory>

<Directory /var/www/html/part-three/public/>
  Options Indexes FollowSymLinks MultiViews
  AllowOverride All
  Order allow,deny
  allow from all
  Require all granted
</Directory>


LogLevel debug
ErrorLog ${APACHE_LOG_DIR}/error.log
CustomLog ${APACHE_LOG_DIR}/access.log combined

# vim: syntax=apache ts=4 sw=4 sts=4 sr noet
So in the example above we are setting Apache up to serve three instances of our App Template Laravel application. We’ll link each instance to a different version of the App Template, and this will allow us to view what the application looks like for the first, second, and third parts. Clearly you could easily add additional instances of other Laravel applications and/or projects as you see fit.
We’ll wrap up this section by restarting Apache:
sudo systemctl restart apache2
Deploy the first application instance
We are now ready to deploy the first application instance:
Deploy application source code
We start by deploying the Laravel application source code onto the server. For this post we’ll be deploying the Application Template project code we’ve been working on in previous posts. (You can find the first article in the series here.) Since each post in the series adds new functionality, it would be nice if we could run each stage of development as a separate application instance. We could then view the progress of the application by interacting with the versions live.
Clone from git
From the command terminal:
cd /var/www/html/
sudo git clone -b PartOne https://github.com/nrasch/AppTemplate.git part-one
This places a copy of the PartOne branch into the /var/www/html/part-one directory, which we created an alias for in the /etc/apache2/sites-available/000-default.conf file above.
Configure
From the command terminal:
cd /var/www/html/part-one
sudo chown -R ubuntu:ubuntu ./
find ./ -type f -exec chmod 644 {} \;
find ./ -type d -exec chmod 755 {} \;
sudo chgrp -R www-data storage bootstrap/cache
chmod -R ug+rwx storage bootstrap/cache
This will set the proper permissions on the Laravel folders.
We also need to enable base rewriting. Edit the the public/.htaccess file, and ensure you have the following two lines:
RewriteEngine On
RewriteBase "/part-one/"
Install composer and npm packages
Next run the following commands to install the composer and npm packages:
composer update
npm install
npm run dev

composer dump-autoload && php artisan cache:clear
Create and update the .env file
We also need to create an .env file, and configure it for the application instance.
From the command terminal:
cp .env.example .env
Edit the new .env file and update APP and DB sections as follows:
APP_NAME='Application Template Part One'
APP_ENV=local
APP_KEY=base64:WVOLcnrIHJebzm3WOexSohpDxYN/3tlMx4YnGss65FY=
APP_DEBUG=true
APP_URL=http://<YOUR_IP>/part-one/

DB_CONNECTION=mysql
DB_HOST=127.0.0.1
DB_PORT=3306
DB_DATABASE=app_template_part_one
DB_USERNAME=app_template
DB_PASSWORD=!app_template!
And wrap up with the following command:
php artisan key:generate
Configure the database
At this point the source code has been deployed and configured, but we still need to modify the database to support the application.
Open a SQL CLI with the sudo mysql command, and execute the following statements:
CREATE DATABASE app_template_part_one CHARACTER SET utf8 COLLATE utf8_general_ci;
CREATE USER 'app_template'@'localhost' IDENTIFIED BY '!app_template!';
GRANT ALL PRIVILEGES ON app_template_part_one.* TO 'app_template'@'localhost';
FLUSH PRIVILEGES;
quit;
This creates the database, database user, and permissions the Laravel application will utilize for database operations, storage, etc.
Seed the database
To wrap up we’ll seed the database. From the command prompt:
php artisan migrate --seed
Test the deployment
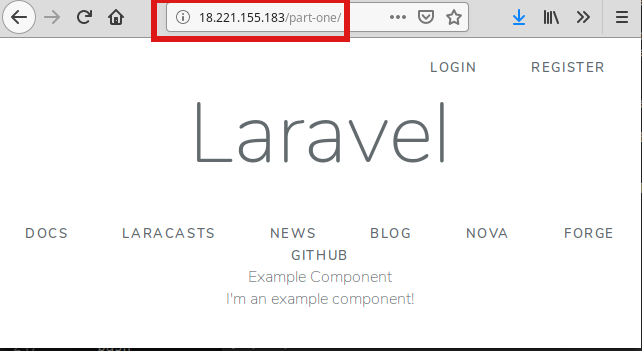
At this point you should be able to open a browser, point it at http://__YOUR_IP__/part-one, and see an instance of the application template load.
Ex:

Deploy the second application instance
We can now deploy the second Laravel application instance. For this example we’ll deploy the third part of the Application Template series. The steps are almost exactly the same as before, so we’ll simply paste the commands in a single code block for reference:
# Deploy the source code
cd /var/www/html/
sudo git clone -b PartThree https://github.com/nrasch/AppTemplate.git part-three

# Set the permissions
cd /var/www/html/part-three/
sudo chown -R ubuntu:ubuntu ./
find ./ -type f -exec chmod 644 {} \;
find ./ -type d -exec chmod 755 {} \;
sudo chgrp -R www-data storage bootstrap/cache
chmod -R ug+rwx storage bootstrap/cache

# Edit the public/.htaccess file
vim public/.htaccess
    RewriteEngine On
    RewriteBase "/part-three/"

# Create a new .env file
cp .env.example .env

# Edit the .env file
vim .env
    APP_NAME='Application Template Part Three'
    APP_ENV=local
    APP_KEY=base64:WVOLcnrIHJebzm3WOexSohpDxYN/3tlMx4YnGss65FY=
    APP_DEBUG=true
    APP_URL=http://<YOUR_IP>/part-three/

    LOG_CHANNEL=stack

    DB_CONNECTION=mysql
    DB_HOST=127.0.0.1
    DB_PORT=3306
    DB_DATABASE=app_template_part_three
    DB_USERNAME=app_template
    DB_PASSWORD=!app_template!

# Create the database for the application
sudo mysql
    CREATE DATABASE app_template_part_three CHARACTER SET utf8 COLLATE utf8_general_ci;
    GRANT ALL PRIVILEGES ON app_template_part_three.* TO 'app_template'@'localhost';
    FLUSH PRIVILEGES;
    quit;

# Install the composer and npm packages
composer update
npm install
npm run dev

# Reload Laravel and clear out cache
composer dump-autoload && php artisan cache:clear

# Seed the database
php artisan migrate --seed

# Create a new application key
php artisan key:generate
You would simply repeat this process for each new Laravel application instance you wanted to deploy.
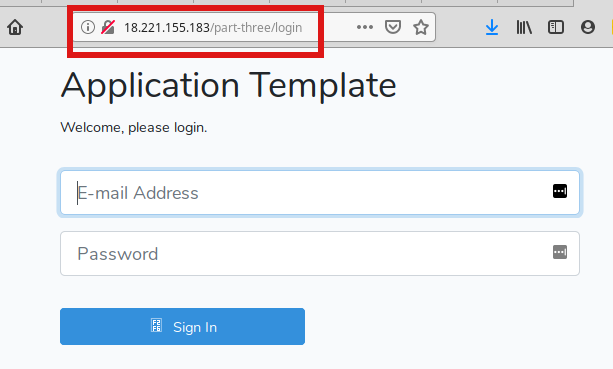
And finally, let’s test it out:

Summary
This post has covered the steps to instantiate and configure a Linux server running on the cloud that is able to serve multiple Laravel project applications. We were able to clone and deploy two such items, and we were also able to browse to and interact with them.
If you have any comments or questions please don’t hesitate to reach out.
Thanks!


Comments